- Documentation
- Getting Started
- JArchitect Analysis
- JArchitect Plugin for Sonar
- Code Rule and Query
- JArchitect Features
- Build Process Integration
- Code Metrics Definitions
- Code Coverage FAQ
- Trend Monitoring
Integrate JArchitect with TeamCity
- Installing JArchitect on the build server
- Configuring TeamCity
- Setting up the JArchitect Report in the TeamCity Dashboard
Installing JArchitect on the build server
To be able to run JArchitect analysis during a build on a TeamCity server you need to install JArchitect on the server which hosts the TeamCity agent that will run the JArchitect analysis. Just unzip JArchitect in a folder that the TeamCity agent can use. In our example we will use “C:\Program Files\_Tools\Development\jarchitect”.
Configuring TeamCity
- First step: Create a JArchitect project (.jdproj) Once you have created your JArchitect project you must execute a command line to generate JArchitectOut directory which contains JArchitect report files:
- Go to Projects tab and choose your project
- Click on “edit project settings”, you will see your build configurations.

- Click on build
- Click on build steps
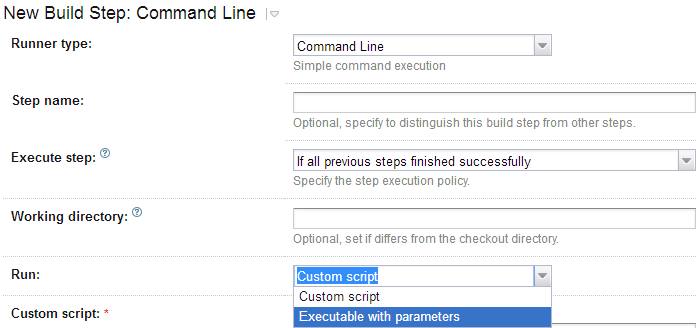
- In the build steps you can add a build step (Add build Step) and choose Command line in build runner type
- In the option Run choose Executable with parameters
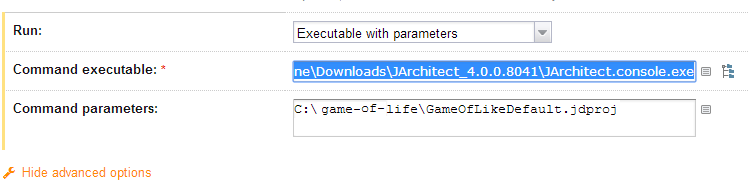
- In the "Command executable" specify the path of your JArchitect console.
- In the "Command parameters" specify the path of your JArchitect project (.jdproj).
Save the configuration and run build.
Setting up the JArchitect Report in the TeamCity Dashboard
-
To publish JArchitect HTML report:
- Go to the Projects tab and choose your project
- Click on “edit project settings”
- Click on Report tabs
- In the build report tabs click on "Create new build report tab"

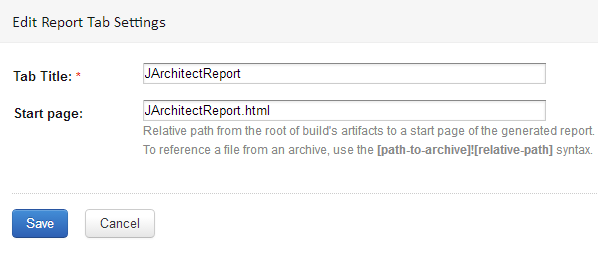
Write the name of your report tab, specify the start page of your JArchitect report and click on Save.
- Go to Projects tab and choose your project
- Click on your last build
- Click on "Edit Configuration Settings"
- Under the "Artifact paths" specify the path of JArchitect out directory which contains the JArchitect Report

- Save the configuration and run build once. The Report will be generated.
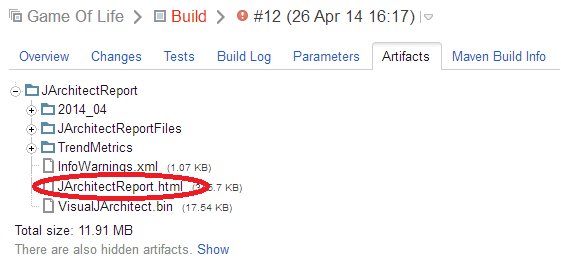
- Go to your last build and click on artifact tab; you can see now a tab that contains your html report